


Call Recording and AI Transcription
Record both inbound and/or outbound audio, with post recording AI transcription.
Select Switchboard > select Number.
Select Advanced > Call Recording > Set Preferences
SAVE
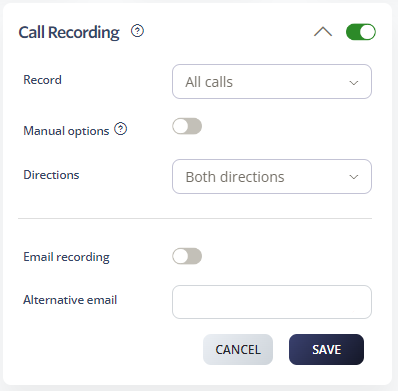
Call Recording Options
Record: Select which calls to record. You can select all or selected calls only.
All calls: This option captures all incoming and outgoing calls made through your extension or a specific phone number. Every conversation will be automatically recorded, providing a complete record of your communication.
Selected calls: This option allows you to choose which calls get recorded. You can manually initiate recording during a call or set up rules to record calls based on specific criteria. If you choose select calls you must insert the specific number to record.
Manual options: Allow this option if you wish to be able to use *3 during the call to NOT record it.
Directions: Select which direction to record calls: Record in both directions / Record only Outbound Calls / Record only Inbound Calls.
Email recording: This sends a copy to the email set on Personal Details.
Alternative email: Nominate an email address to send calls to – if different from the email in Personal Details.
AI Transcription
This feature enhances call management and analysis by providing accurate and accessible transcriptions of recorded calls.
To access call transcriptions:
Log in to your account
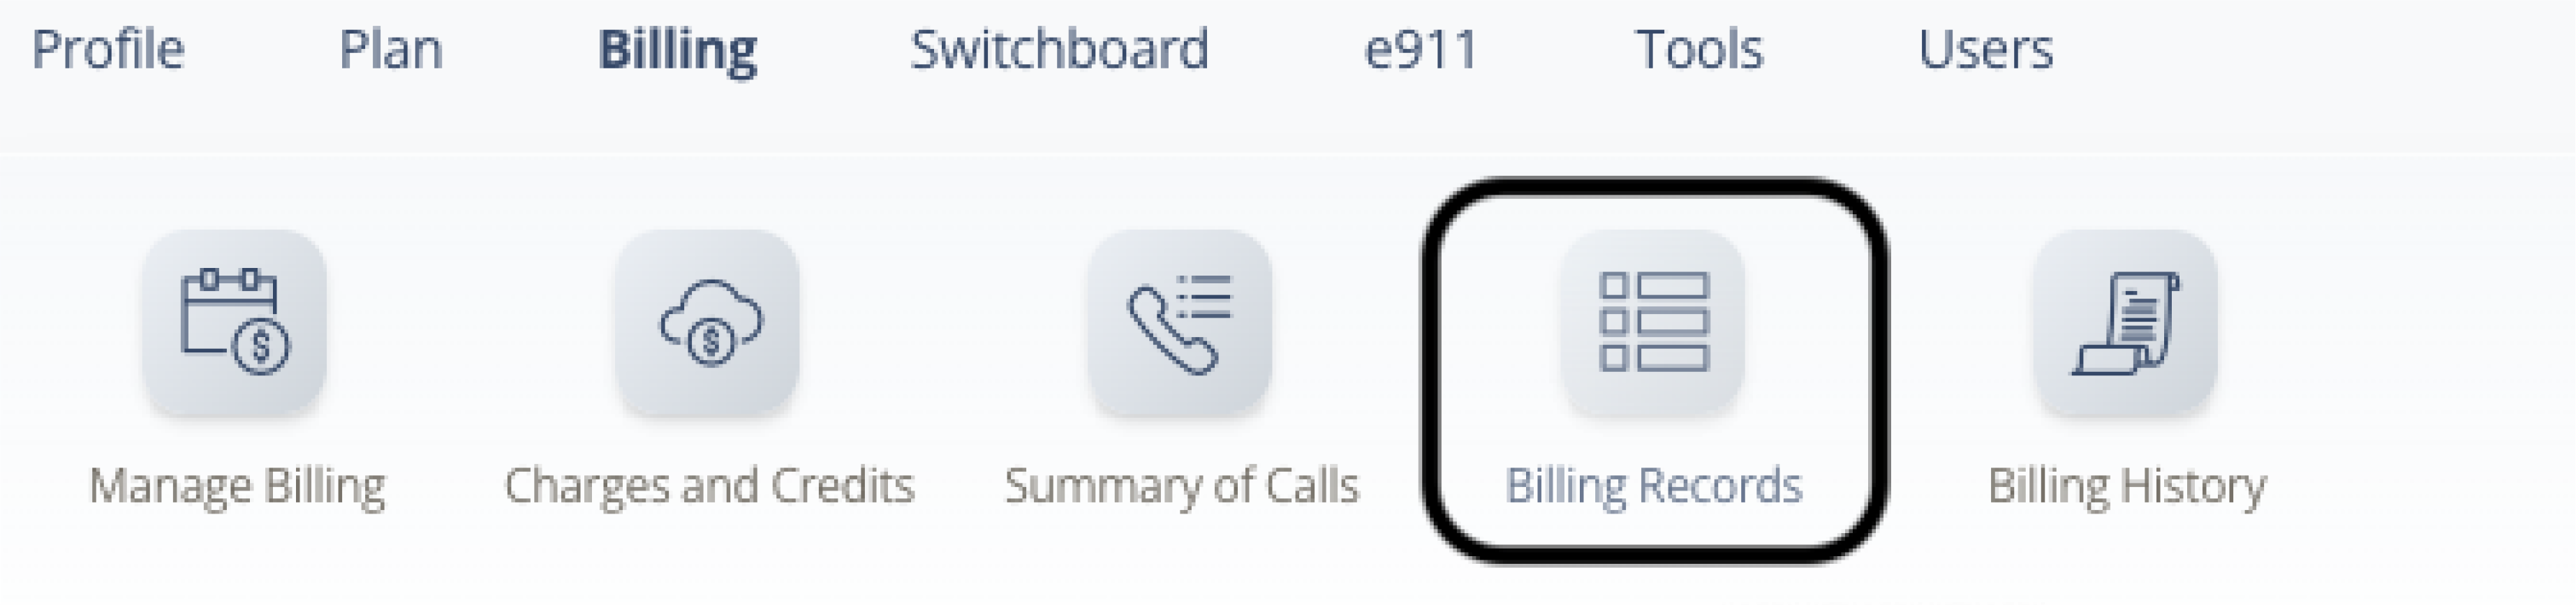
Select Billing > Billing Records .
Look for the call you wish to view the transcription for. Use the filters to help you find calls, then click on Search.
Click on the Transcription icon associated with the specific call.
The transcription will be readily accessible, allowing you to review the call's content efficiently.
Note: After you end a call, the transcriptions take around 10 minutes.
Important!
Call Recording must be used in a way that complies with local laws. Please advise the B party caller that Call Recording has been enabled on this account.
Share